16 August 2019

Changing User Email Without Sending Email Notification


In this post we will learn how to change the Email id on User record without sending email notification t the user.

Default Functionality:

In Salesforce user record, if we have to update the email id of the user, we can Edit the user record for that user account and the email notification will be sent to the user on updated email id to confirm the same. Once the user confirm the changed email id via a link in the Salesforce email notification then only the new email id will reflect on Salesforce User record.

Problem:

Many time, if some user leaves the organization or we want to redirect the notifications to some other email id till the time replacement comes or in the Sandbox we want to change the email id to point to some test email id which is not real. Most of the time the Sandbox email are not the real ones so it becomes difficult to confirm new email id after changing it. In these scenario, we don't want to send the email notification to confirm the new email id, the new email id should be reflected without confirmation.


Solution:

Go to the User record for which you want to update the email id. Update/change the email id and then scroll down and click the checkbox "Generate new password and notify user immediately" as highlighted in below screenshot. This will make sure there is no email notification due to change/update of email id and the email change will immediately reflect on user record.


Thanks for reading! See in the next blog post.

29 April 2018

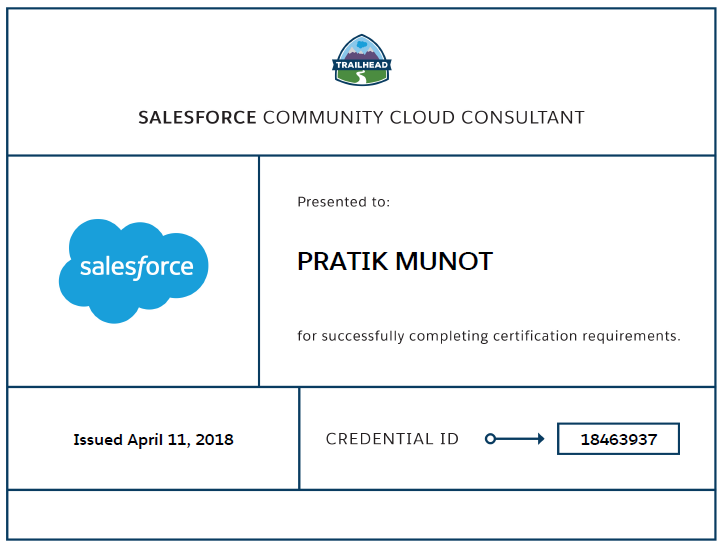
Salesforce Community Cloud Consultant Certification: Passing Hacks

How to Pass Salesforce Community Cloud Consultant Certification

I appeared for Community Cloud certification this month and cleared it in the first attempt to become 7X Salesforce Certified. (Sales, Service , Community, App builder, Platform, Admin, Advanced Admin)

In this blog I am going to share the tips and trick to pass the Community Cloud Certification.

As you all know for every certification Salesforce provides you with the study guide which you can go through on the Salesforce Certification site.

Best way to start preparation is to go through the Study guide and get into the mentioned topics; having community implementation experience is key advantage.

Let me describe important points which will help you crack this exam:

1. Sharing Model: This is always has first priority but in terms of Community study:
     - External sharing model
     - Public access setting/ guest access to community
     - Moderation Permissions
     - Portal & community user access

2. Community Implementation: This is crucial as 15-20 questions were focused on this
     - Study different Templates mainly Napili as most of the question were related to this template.
     - Partner Central, VF + Tab & Customer Account Portal has less weightage
     - Community Workspace: go through each menu in this
     - Gamification i.e. Leaderboard,  Contribution points ,levels etc.
     - Community Builder: Very important; 10-12 questions were related to this topic.
     - Community Migration

3. Community Licenses: Understand it really well. 5-6 questions were related to this topic.

Here are the Notes that I made for my own reference and will be very helpful for you as well!

1. Total number of communities: 100 (Active + Inactive)
2. Community Licenses: Customer Community, Customer community Plus, Partner community, Employees community
3. Community template is based on the use case that you are building
4. Topics in Napili Template: 25 main topic and then 10 subtopic, upto 5 level
5. Super User access
6. Delegated Admin: Create & update user, Reset password and deactivate user
7. Sharing Sets to share records in Customer community
8. Moderation rules: Content criteria & Member criteria
9. Guest user access
10. Community Migration: You can update the community but not create one in production.
11. Login to community via social media : Configure Authentication Provider
12. Go through Community Roll out Trailhead 
13. Go through: Community migration with Change set
14. Go through: Ways to deploy communities

Hope above resources will help you to pass the exam.

Wish you a good luck! Please leave comments below!


17 August 2017

Salesforce Winter'18 Release: Top Features

Salesforce is bringing cool feature set in it's Winter'18 release:
Lightning Experience Related
  • Cool Animation effect on the footer components

  • Themes and Branding
  • More Global actions in LEX
  • New Utility Bar Item - Quip
  • Omni Channel is no more a Beta feature
  • New Step in the App Creation Wizard to add Navigation Rules
  • Lightning Dashboard Tables in Beta
App Cloud Related
  • New Standard Objects
  • Content Deliveries holds Public Links too

Community Cloud Related
  • New Template added
  • Ability to create your own template
  • More options on CMS Connect functionality
  • New Library Component (No Idea about the functionality)

Key Dates:


1 January 2015

12 Inspirational Quotes to Kick Off the New Year

12 Inspirational Quotes to Kick Off the New Year

3 November 2014

Tracking First Response on Case Record

Tracking First Response on Case based on Case Comment 

This is common requirement to track the First Response time on Case based on the first Case comment.

Here is the simple Solution:


1. Create a custom field of type Date/time called first response time on Case object.

2. Create a workflow rule on "Case comment" object"  with criteria where first response time is NULL.

Screenshot:


3. Create a Workflow Field update on this rule to update the first response to NOW().

Screenshot:

4. Finally Activate the Workflow Rule.

Hope this will help you.

Salesforce:View state Best Practices

View state Best Practices

Most of us get error regarding "Maximum view state size limit (135KB) exceeded."

This post talks about the Best Practices to avoid this error& Optimizing size of View State:

1. Minimize number of form on a page: Assume a page contains two forms - form 1 and form 2. Irrespective of which form the user submits and causes a post back, the view state for the page needs to get transferred. To support this, each form on your page will have its own copy of view state.

2. Declare variable as transient: An instance variable declared as transient is not saved and is not transmitted as part of the view state. If a certain field is needed only for the duration of the page request and does not need to be part of the view state, declare it as transient.

3. Refine your SOQL to only retrieve the data needed by the page: Only retrieve (and store) the fields you need and also filter the data to only retrieve data needed by the page.

4. Refactor your pages to make its view stateless: Instead of using apex:commandLink or apex:commandButton components (which needs to be inside a apex:form component) to invoke an action, use an apex:outputLink or other non action method instead and implement the action through an apex:page action attribute - where it makes sense.

5. Use custom objects or custom settings to store large quantities of read only data

Hope this will help you! 

16 October 2014

Salsforce Analytic Wave!!!

31 May 2014

Salesforce and Microsoft buddy up over Office 365!!

Salesforce and Microsoft buddy up over Office 365!!!

Details:   http://www.infoworld.com/t/saas/microsoft-and-salesforce-unexpectedly-buddy-over-office-365-243405

Hope for the best from both the worlds!!!

24 April 2014

Converting Lead without creating Opportunity with a Button Click

Converting Lead without creating Opportunity with a Button Click.

Marketing executives create the Leads and they convert the Potential Leads through standard Lead Convertbutton on the Lead record.
Lead Conversion will convert Lead to Account, contact and Opportunity.
In many of the organization the Marketing executives want to Convert Leads to Account and Contact but they don’t want to create the potential Opportunity on the Lead conversion.

To achieve this there is Standard Checkbox on the record called Do not create a new opportunity upon conversion.  It's unchecked by default.


If you select this checkbox then Lead will get convert into Account and Contact but Opportunity will not get created.

We can make it a Button Click rather to select the checkbox manually every time.

Button: Convert Lead without Opportunity

Trick:
1. Go to Setup -> Customize -> Lead ->Buttons, Links and          Actions
2. Create a new Button called “Convert Lead without                  Opportunity”
3. Behaviour: Display in existing window without sidebar or        header
4. URL :    /lead/leadconvert.jsp?retURL=%2F{!Lead.Id}&id=                  {!Lead.Id}&nooppti=1

5. Put the button on Lead Page layout.


Button Snapshot:


Lead Pagelayout with Button Snapshot:


Now Try to click on "Convert Lead without opp" button you will find the checkbox Do not create a new opportunity upon conversion selected by default.


Try this and let me know your feedback...

23 April 2014

Workflow Rule: Field Update Limitation Trick

Workflow Rule: Field Update Limitation Trick

We use workflow rules which gets executed based on the Entry Criteria and Condition met.

We can send an Email Alert, Assign Task, Update the field and Send Outbound message.

There is one Limitation with the Workflow Field Update.

Field Update Limitation:

The results of a field update can not trigger additional workflow rules which are dependant on that updated field.

Trick to overcome the Limitation:

When creating the Workflow Field Update Action, check the checkbox  “Re-evaluate Workflow Rules after Field Change”.


Selecting the "Re-evaluate Workflow Rules After Field Change checkbox" on the Field Update Edit page allows you to set a workflow field update to re-evaluate all workflow rules on the object if the field update results in a change to the value of the field.

This will overcome the limitation of Field update.  

Try this and let me know your feedbacks.

21 April 2014

Freeze User Account

Freezing the User Account.

Deactivation of user is regular task for Salesforce Administrator. Whenever a user leaves the organization, to deactivate the user we need to transfer his/her all open records to another user / new hire. 
Sometimes the new hire in the position of deactivated users takes time to on board so in this case what we should do with the open records of the User that left???

Freeze User Account:

Salesforce has introduced the new feature "Freeze" user account.

This will prevent the user from logging into the Salesforce till the time you transfer his/her records and Deactivate him completely. 

Steps:
1.  Setup->Manage User
2.  Click the name of User
3.  Click "Freeze" button.

19 April 2014

User Login History Report

User Login Report: Count of User Logins.

Its necessary for a Salesforce System Administrator to report on Count of User logins in to the system.
It gives an idea of Salesforce Usage and Adoption.
In many organization, the Salesforce License Review is done based on the Count of User Login.

Trick:

A simple Matrix Report.

Steps:

1. Go to Report
2. Click on "New Report"
3. Select Report type "User"
4. Report Format: "Matrix Report"
5. Drag the field "Full name" and "Login Date"
6. See the screenshot below.
7. You can group the "Login Date" by "Group by Date" as per fiscal year or calender year.


 8. Run the report
 9. Click on "Hide Details".
 10. See the final Report as per below screenshot


16 April 2014

Account Merge with a button click

Salesforce Tips and Tricks:
One click Account Merge without any coding:

In most of the organization removing duplicates is the big task. Mostly in case of accounts, the admins get involved in the cumbersome process of Merging the Accounts.
To merge accounts they follow 4 step Process:
  1.       .  Go to Account
  2.          Go to Merge Accounts 
  3.           Put the common name of Accounts to merge
  4.          Finally merge the account.


But this Process can be made very simple and a Button Click and without navigating from the account with the steps below:

1.       Go to Setup -> Account-> Buttons, Links and Actions
2.       Create new Button named “Merge”
3.       Put Content Source : URL
4.       Put URL as:     /merge/accmergewizard.jsp?srch={!Account.Name}
5.       Save.
6.       Go to Account Page layout and add the “Merge” button on Page layout.


Snapshot: Button Properties


 Snapshot: Account Page layout with "Merge" Button


When you will click on Merge Button on the account it will search for the same account names in the salesforce and will display the names of accounts to merge automatically without putting name of account as below snapshot shows:


Try this and let me know your feedbacks!!


2 April 2014

Salesforce: How to Convert 15 digit Id to 18 Digit Id

How to Convert 15 digit Id to 18 Digit Id

It's common scenario where we need to convert 15 Digit Case Sensitive Salesforce Record Id to 18 Digit Case insensitive Id. 
It's necessary to have 18 digit Case insensitive Id when it comes to VLOOKUP in Excel sheet for various purposes.

It's possible to convert 15 digit Id to 18 digit Id without any Code.

Trick:

1. Go to Object-> fields
2.Create a new field of field type "Formula".
3.Put formula:  CASESAFEID( Id )


4. Go to the Page layout and put this field on the page layout.


Try this Trick and let me know your feedback...

Salesforce: How to Create a field to display amount in native Currency

Salesforce: How to Create a field to display amount in native Currency


This is a very common scenario to convert the Opportunity amount or Revenue into the user's native currency.

Every organization has it's Basic currency called "Corporate Currency" and in a global organization there is a user base which belongs to different regions and countries which has different Currency that the Corporate Currency.


In this case you can create a New field and choose the "Field Type"  as "Currency"


Currency field type is the Key Trick here.


Hope it will be useful. Don't forget to comment.


1 April 2014

Salesforce: Chatter Sync (Pilot) Functionality

Salesforce Chatter Sync Functionality (Pilot)

Now you can sync your chatter and desktop. Chatter Sync is in pilot mode in spring'14 release. You can request Salesforce support to enable this option for you organization.

Salesforce Order Management

Salesforce Order Management:

In the Spring'14 release Salesforce comes with much awaited functionality "Order Management"
Currently Order management is available on Account and  Contarcts.